ReFrame How Tos
This is a collection of “How To” articles on specific ReFrame usage topics.
Working with build systems
ReFrame supports building the test’s code in many scenarios. We have seen in the ReFrame Tutorial how to build the test’s code if it is just a single file. However, ReFrame knows how to interact with Make, CMake and Autotools. Additionally, it supports integration with the EasyBuild build automation tool as well as the Spack package manager. Finally, if none of the above build systems fits, users are allowed to use their custom build scripts.
Using Make, CMake or Autotools
We have seen already in the tutorial how to build a test with a single source file.
ReFrame can also build test code using common build systems, such as Make, CMake or Autotools.
The build system to be used is selected by the build_system test attribute.
This is a “magic” attribute where you assign it a string and ReFrame will create the appropriate build system object.
Each build system can define its own properties, but some build systems have a common set of properties that are interpreted accordingly.
Let’s see a version of the STREAM benchmark that uses make:
import os
import reframe as rfm
import reframe.utility.sanity as sn


class build_stream(rfm.CompileOnlyRegressionTest):
    build_system = 'Make'
    sourcesdir = 'https://github.com/jeffhammond/STREAM.git'
    array_size = variable(int, value=0)

    @run_before('compile')
    def prepare_build(self):
        omp_flag = self.current_environ.extras.get('omp_flag')
        self.build_system.options = ['stream_c.exe']
        self.build_system.cflags = ['-O3', omp_flag]
        if self.array_size:
            self.build_system.cflags += [f'-DARRAY_SIZE={self.array_size}']


@rfm.simple_test
class stream_test(rfm.RunOnlyRegressionTest):
    valid_systems = ['*']
    valid_prog_environs = ['+openmp']
    stream_binary = fixture(build_stream, scope='environment')
    num_threads = variable(int, value=0)

    @run_after('setup')
    def set_executable(self):
        self.executable = os.path.join(self.stream_binary.stagedir,
                                       'stream_c.exe')

    @run_before('run')
    def set_num_threads(self):
        if self.num_threads:
            self.env_vars['OMP_NUM_THREADS'] = self.num_threads

    @sanity_function
    def validate(self):
        return sn.assert_found(r'Solution Validates', self.stdout)

    @performance_function('MB/s')
    def copy_bw(self):
        return sn.extractsingle(r'Copy:\s+(\S+)', self.stdout, 1, float)

    @performance_function('MB/s')
    def triad_bw(self):
        return sn.extractsingle(r'Triad:\s+(\S+)', self.stdout, 1, float)
Build system properties are set in a pre-compile hook.
In this case we set the CFLAGS and also pass Makefile target to the Make build system’s options.
Warning
You can’t set build system options inside the test class body. The test must be instantiated in order for the conversion from string to build system to happen. The following will yield therefore an error:
class build_stream(rfm.CompileOnlyRegressionTest):
    build_system = 'Make'
    build_system.flags = ['-O3']
Based on the selected build system, ReFrame will generate the appropriate build script.
 reframe -C config/baseline_environs.py -c stream/stream_make.py -p gnu -r
 cat output/tutorialsys/default/gnu/build_stream_40af02af/rfm_build.sh
#!/bin/bash

_onerror()
{
    exitcode=$?
    echo "-reframe: command \`$BASH_COMMAND' failed (exit code: $exitcode)"
    exit $exitcode
}

trap _onerror ERR

make -j 1 CC="gcc" CXX="g++" FC="ftn" NVCC="nvcc" CFLAGS="-O3 -fopenmp" stream_c.exe
Note that ReFrame passes several variables in the make command apart from those explicitly requested by the test, such as the CFLAGS.
The rest of the flags are implicitly requested by the selected test environment, in this case gnu, and ReFrame is trying its best to make sure that the environment’s definition will be respected.
In the case of Autotools and CMake these variables will be set during the “configure” step.
Users can still override this behaviour and request explicitly to ignore any flags coming from the environment by setting the build system’s flags_from_environ to False.
In this case, only the flags requested by the test will be emitted.
The Autotools and CMake build systems are quite similar.
For passing configure options, the config_opts build system attribute should be set, whereas for make options the make_opts should be used.
The OSU benchmarks in the main tutorial use the Autotools build system.
Finally, in all three build systems, the max_concurrency can be set to control the number of parallel make jobs.
Integrating with EasyBuild
Added in version 3.5.0.
ReFrame integrates with the EasyBuild build automation framework, which allows you to use EasyBuild for building the source code of your test.
Let’s consider a simple ReFrame test that installs zlib-1.3.1 given the easyconfig zlib-1.3.1.eb and checks that the installed version is correct.
The following code block shows the check, highlighting the lines specific to this tutorial:
import reframe as rfm
import reframe.utility.sanity as sn


@rfm.simple_test
class ZlibEBCheck(rfm.RegressionTest):
    descr = 'Demo test using EasyBuild to build the test code'
    valid_systems = ['*']
    valid_prog_environs = ['builtin']
    executable = 'ls'
    executable_opts = ['$LD_LIBRARY_PATH/libz.so.1.3.1']
    build_system = 'EasyBuild'

    @run_before('compile')
    def setup_build_system(self):
        self.build_system.easyconfigs = ['zlib-1.3.1.eb']
        self.build_system.options = ['-f']

    @run_before('run')
    def prepare_run(self):
        self.modules = self.build_system.generated_modules

    @sanity_function
    def assert_exists(self):
        return sn.assert_eq(self.job.exitcode, 0)
The test looks pretty standard except that we use the EasyBuild build system and set some build system-specific attributes.
More specifically, we set the easyconfigs attribute to the list of packages we want to build and install.
We also pass the -f option to EasyBuild’s eb command through the options attribute, so that we force the build even if the corresponding environment module already exists.
For running this test, we need the following Docker image:
docker build -t reframe-eb-spack:latest -f examples/tutorial/dockerfiles/eb-spack.dockerfile .
docker run -h myhost --mount type=bind,source=$(pwd)/examples/,target=/home/user/reframe-examples --workdir=/home/user/reframe-examples/tutorial -it reframe-eb-spack:latest  /bin/bash -l
EasyBuild requires a modules system to run, so we need a configuration file that sets the modules system of the current system:
site_configuration = {
    'systems': [
        {
            'name': 'tutorialsys',
            'descr': 'Example system',
            'hostnames': ['myhost'],
            'modules_system': 'lmod',
            'partitions': [
                {
                    'name': 'default',
                    'descr': 'Example partition',
                    'scheduler': 'local',
                    'launcher': 'local',
                    'environs': ['builtin']
                }
            ]
        }
    ]
}
We talk about modules system and how ReFrame interacts with them in Working with environment modules. For the moment, we will only use them for running the EasyBuild example:
reframe -C config/baseline_modules.py -c easybuild/eb_test.py -r
ReFrame generates the following commands to build and install the easyconfig:
cat output/tutorialsys/default/builtin/ZlibEBCheck/rfm_build.sh
...
export EASYBUILD_BUILDPATH=${stagedir}/easybuild/build
export EASYBUILD_INSTALLPATH=${stagedir}/easybuild
export EASYBUILD_PREFIX=${stagedir}/easybuild
export EASYBUILD_SOURCEPATH=${stagedir}/easybuild
eb zlib-1.3.1.eb -f
All the files generated by EasyBuild (sources, temporary files, installed software and the corresponding modules) are kept under the test’s stage directory, thus the relevant EasyBuild environment variables are set.
Tip
Users may set the EasyBuild prefix to a different location by setting the prefix attribute of the build system.
This allows you to have the built software installed upon successful completion of the build phase, but if the test fails in a later stage (sanity, performance), the installed software will not be cleaned up automatically.
Note
ReFrame assumes that the eb executable is available on the system where the compilation is run (typically the local host where ReFrame is executed).
To run the freshly built package, the generated environment modules need to be loaded first.
These can be accessed through the generated_modules attribute after EasyBuild completes the installation.
For this reason, we set the test’s modules in a pre-run hook.
This generated final run script is the following:
cat output/tutorialsys/default/builtin/ZlibEBCheck/rfm_job.sh
module use ${stagedir}/easybuild/modules/all
module load zlib/1.3.1
ls $LD_LIBRARY_PATH/libz.so.1.3.1
Packaging the installation
The EasyBuild build system offers a way of packaging the installation via EasyBuild’s packaging support.
To use this feature, the FPM package manager must be available.
By setting the dictionary package_opts in the test, ReFrame will pass --package-{key}={val} to the EasyBuild invocation.
For instance, the following can be set to package the installations as an rpm file:
self.keep_files = ['easybuild/packages']
self.build_system.package_opts = {
    'type': 'rpm',
}
The packages are generated by EasyBuild in the stage directory.
To retain them after the test succeeds, keep_files needs to be set.
Integrating with Spack
Added in version 3.6.1.
ReFrame can also use Spack to build a software package and test it.
The example shown here is the equivalent to the EasyBuild one that built zlib.
Here is the test code:
import reframe as rfm
import reframe.utility.sanity as sn


@rfm.simple_test
class ZlibSpackCheck(rfm.RegressionTest):
    descr = 'Demo test using Spack to build the test code'
    valid_systems = ['*']
    valid_prog_environs = ['builtin']
    executable = 'pkg-config'
    executable_opts = ['--libs', 'zlib']
    build_system = 'Spack'

    @run_before('compile')
    def setup_build_system(self):
        self.build_system.specs = ['zlib@1.3.1']

    @sanity_function
    def assert_version(self):
        return sn.assert_found(
            r'-L.*/spack/linux-.*/zlib-1.3.1-.*/lib -lz', self.stdout
        )
When build_system is set to 'Spack', ReFrame will leverage Spack environments in order to build the test code.
By default, ReFrame will create a new Spack environment in the test’s stage directory and add the requested specs to it.
Note
Optional spec attributes, such as target and os, should be specified in specs and not as install options in install_opts.
You can set Spack configuration options for the new environment with the config_opts attribute. These options take precedence over Spack’s spack.yaml defaults.
Users may also specify an existing Spack environment by setting the environment attribute.
In this case, ReFrame treats the environment as a test resource so it expects to find it under the test’s sourcesdir, which defaults to 'src'.
To run this test, use the same container as with EasyBuild:
docker run -h myhost --mount type=bind,source=$(pwd)/examples/,target=/home/user/reframe-examples --workdir=/home/user/reframe-examples/tutorial -it reframe-eb-spack:tutorial /bin/bash -l
Conversely to EasyBuild, Spack does not require a modules systems to be configured, so you could simply run the test with ReFrame’s builtin configuration:
reframe -c spack/spack_test.py -r
As with every other test, ReFrame will copy the test’s resources to its stage directory before building it.
ReFrame will then activate the generated environment (either the one provided by the user or the one generated by ReFrame), add the given specs using the spack add command and, finally, install the packages in the environment.
Here is what ReFrame generates as a build script for this example:
spack env create -d rfm_spack_env
spack -e rfm_spack_env config add "config:install_tree:root:opt/spack"
spack -e rfm_spack_env add zlib@1.3.1
spack -e rfm_spack_env install
As you might have noticed ReFrame expects that Spack is already installed on the system. The packages specified in the environment and the tests will be installed in the test’s stage directory, where the environment is copied before building. Here is the stage directory structure:
stage/generic/default/builtin/BZip2SpackCheck/
├── rfm_spack_env
│   ├── spack
│   │   └── opt
│   │       └── spack
│   │           ├── bin
│   │           └── darwin-catalina-skylake
│   ├── spack.lock
│   └── spack.yaml
├── rfm_ZlibSpackCheck_build.err
├── rfm_ZlibSpackCheck_build.out
├── rfm_ZlibSpackCheck_build.sh
├── rfm_ZlibSpackCheck_job.err
├── rfm_ZlibSpackCheck_job.out
└── rfm_ZlibSpackCheck_job.sh
Finally, here is the generated run script that ReFrame uses to run the test, once its build has succeeded:
#!/bin/bash
spack env create -d rfm_spack_env
eval `spack -e rfm_spack_env load --sh zlib@1.3.1`
pkg-config --libs zlib
From this point on, sanity and performance checking are exactly identical to any other ReFrame test.
Tip
While developing a test using Spack or EasyBuild as a build system, it can be useful to run ReFrame with the --keep-stage-files and --dont-restage options to prevent ReFrame from removing the test’s stage directory upon successful completion of the test.
For this particular type of test, these options will avoid having to rebuild the required package dependencies every time the test is retried.
Custom builds
There are cases where you need to test a code that does not use of the supported build system of ReFrame.
In this case, you could set the build_system to 'CustomBuild' and supply the exact commands to build the code:
@rfm.simple_test
class CustomBuildCheck(rfm.RegressionTest):
    build_system = 'CustomBuild'

    @run_before('compile')
    def setup_build(self):
        self.build_system.commands = [
            './myconfigure.sh',
            './build.sh'
        ]
Warning
You should use this build system with caution, because environment management, reproducibility and any potential side effects are all controlled by the custom build system.
Custom performance reference indexing
Added in version 4.10.
By default the reference attribute is indexed by the system and/or system/partition combination.
However, it is often the case that the reference values depend on test variables and/or parameters.
ReFrame allows you to define a custom index for the reference dictionary by using the special $index key.
Here is an example reference definition for the stream benchmark tutorial example where references are defined per number of threads and thread placement:
import os
import reframe as rfm
import reframe.utility.sanity as sn


class build_stream(rfm.CompileOnlyRegressionTest):
    build_system = 'SingleSource'
    sourcepath = 'stream.c'
    executable = './stream.x'
    array_size = variable(int, value=0)

    @run_before('compile')
    def prepare_build(self):
        omp_flag = self.current_environ.extras.get('omp_flag')
        self.build_system.cflags = ['-O3', omp_flag]
        if self.array_size:
            self.build_system.cppflags = [f'-DARRAY_SIZE={self.array_size}']


@rfm.simple_test
class stream_test(rfm.RunOnlyRegressionTest):
    valid_systems = ['*']
    valid_prog_environs = ['+openmp']
    stream_binary = fixture(build_stream, scope='environment')
    num_threads = parameter([1, 2, 4, 8])
    thread_placement = parameter(['close', 'spread'])
    reference = {
        '$index': ('num_threads', 'thread_placement'),
        1: {
            'close': {
                'copy_bw': (10000, -0.2, 0.2, 'MB/s'),
                'triad_bw': (8000, -0.2, 0.2, 'MB/s'),
            },
            'spread': {
                'copy_bw': (10500, -0.2, 0.2, 'MB/s'),
                'triad_bw': (8500, -0.2, 0.2, 'MB/s'),
            },
        },
        2: {
            'close': {
                'copy_bw': (18000, -0.2, 0.2, 'MB/s'),
                'triad_bw': (16000, -0.2, 0.2, 'MB/s'),
            },
            'spread': {
                'copy_bw': (18500, -0.2, 0.2, 'MB/s'),
                'triad_bw': (16500, -0.2, 0.2, 'MB/s'),
            },
        },
        4: {
            'close': {
                'copy_bw': (32000, -0.2, 0.2, 'MB/s'),
                'triad_bw': (29500, -0.2, 0.2, 'MB/s'),
            },
            'spread': {
                'copy_bw': (33000, -0.2, 0.2, 'MB/s'),
                'triad_bw': (30500, -0.2, 0.2, 'MB/s'),
            },
        },
        8: {
            'close': {
                'copy_bw': (60000, -0.2, 0.2, 'MB/s'),
                'triad_bw': (55000, -0.2, 0.2, 'MB/s'),
            },
            'spread': {
                'copy_bw': (62000, -0.2, 0.2, 'MB/s'),
                'triad_bw': (57000, -0.2, 0.2, 'MB/s'),
            },
        },
    }

    @run_after('setup')
    def set_executable(self):
        self.executable = os.path.join(self.stream_binary.stagedir, 'stream.x')

    @run_before('run')
    def setup_threading(self):
        self.env_vars['OMP_NUM_THREADS'] = self.num_threads
        self.env_vars['OMP_PROC_BIND'] = self.thread_placement

    @sanity_function
    def validate(self):
        return sn.assert_found(r'Solution Validates', self.stdout)

    @performance_function('MB/s')
    def copy_bw(self):
        return sn.extractsingle(r'Copy:\s+(\S+)', self.stdout, 1, float)

    @performance_function('MB/s')
    def triad_bw(self):
        return sn.extractsingle(r'Triad:\s+(\S+)', self.stdout, 1, float)
Special keys are also supported to allow users to index their references by the system, environment, processor and device details.
For example, we could define different references for different environments by using the $environ special key as follows:
reference = {
    '$index': ('$environ', 'num_threads'),
    'gnu': {
        '1': {
            'copy_bw': (10000, -0.2, 0.2, 'MB/s'),
        },
        '2': {
            'copy_bw': (20000, -0.2, 0.2, 'MB/s'),
        },
        '4': {
            'copy_bw': (40000, -0.2, 0.2, 'MB/s'),
        },
    },
    'clang': {
        '1': {
            'copy_bw': (10000, -0.2, 0.2, 'MB/s'),
        },
        '2': {
            'copy_bw': (20000, -0.2, 0.2, 'MB/s'),
        },
        '4': {
            'copy_bw': (40000, -0.2, 0.2, 'MB/s'),
        },
    }
}
External references
Added in version 4.10.
Users can also keep test references in a separate YAML file instead of in the test class.
To achieve this, the special $ref key must be used in the reference dictionary.
reference = {'$ref': 'references/stream.yaml'}
By default, reference files are resolved relative to the test’s prefix directory, but this can be controlled by the reference_prefix configuration option or the RFM_REFERENCE_PREFIX.
The reference file can contain references for multiple tests and the general structure is an 1-1 match to the inline reference dictionary. Here is how the reference file for the previous example would look like:
stream_test:
  $index: ['$environ', 'num_threads']
  gnu:
     1:
        'copy_bw': [10000, -0.2, 0.2, 'MB/s']
     2:
        'copy_bw': [20000, -0.2, 0.2, 'MB/s']
     4:
        'copy_bw': [40000, -0.2, 0.2, 'MB/s']
  clang:
     1:
        'copy_bw': [10000, -0.2, 0.2, 'MB/s']
     2:
        'copy_bw': [20000, -0.2, 0.2, 'MB/s']
     4:
        'copy_bw': [40000, -0.2, 0.2, 'MB/s']
See also
Check the API docs for the reference test’s attribute for all the details on how to define references.
Working with environment modules
A common practice in HPC environments is to provide the software stack through environment modules. An environment module is essentially a set of environment variables that are sourced in the user’s current shell in order to make available the requested software stack components.
ReFrame allows users to associate an environment modules system to a system in the configuration file. Tests may then specify the environment modules needed for them to run.
We have seen environment modules in practice with the EasyBuild integration.
Systems that use environment modules must set the modules_system system configuration parameter to the modules system that the system uses.
site_configuration = {
    'systems': [
        {
            'name': 'tutorialsys',
            'descr': 'Example system',
            'hostnames': ['myhost'],
            'modules_system': 'lmod',
            'partitions': [
                {
                    'name': 'default',
                    'descr': 'Example partition',
                    'scheduler': 'local',
                    'launcher': 'local',
                    'environs': ['builtin']
                }
            ]
        }
    ]
}
The tests that require environment modules must simply list the required modules in their modules variable.
ReFrame will then emit the correct commands to load the modules based on the configured modules system.
For older modules systems, such as Tmod 3.2, that do not support automatic conflict resolution, ReFrame will also emit commands to unload the conflicted modules before loading the requested ones.
Test environments can also use modules by settings their modules parameter.
'environments': [
    ...
    {
        'name': 'gnu',
        'cc': 'gcc',
        'cxx': 'g++',
        'modules': ['gnu'],
        'features': ['openmp'],
        'extras': {'omp_flag': '-fopenmp'}
    }
    ...
]
Environment module mappings
ReFrame allows you to replace environment modules used in tests with other modules on-the-fly.
This is quite useful if you want to test a new version of a module or another combination of modules.
Assume you have a test that loads a gromacs module:
class GromacsTest(rfm.RunOnlyRegressionTest):
    ...
    modules = ['gromacs']
This test would use the default version of the module in the system, but you might want to test another version, before making that new one the default.
You can ask ReFrame to temporarily replace the gromacs module with another one as follows:
reframe -n GromacsTest -M 'gromacs:gromacs/2020.5' -r
Every time ReFrame tries to load the gromacs module, it will replace it with gromacs/2020.5.
You can specify multiple mappings at once or provide a file with mappings using the --module-mappings option.
You can also replace a single module with multiple modules.
A very convenient feature of ReFrame in dealing with modules is that you do not have to care about module conflicts at all, regardless of the modules system backend. ReFrame will take care of unloading any conflicting modules, if the underlying modules system cannot do that automatically. In case of module mappings, it will also respect the module order of the replacement modules and will produce the correct series of “load” and “unload” commands needed by the modules system backend used.
Manipulating ReFrame’s environment
ReFrame runs the selected tests in the same environment as the one that it itself executes in.
It does not unload any environment modules nor sets or unsets any environment variable.
Nonetheless, it gives you the opportunity to modify the environment that the tests execute.
You can either purge completely all environment modules by passing the --purge-env option or ask ReFrame to load or unload some environment modules before starting running any tests by using the -m and -u options respectively.
Of course you could manage the environment manually, but it’s more convenient if you do that directly through ReFrame’s command-line.
If you used an environment module to load ReFrame, e.g., reframe, you can use the -u to have ReFrame unload it before running any tests, so that the tests start in a clean environment:
reframe -u reframe ...
Working with low-level dependencies
We have seen that test fixtures fixtures introduce dependencies between tests along with a scope. It is possible to define test dependencies without a scope using the low-level test dependency API. In fact, test fixtures translate to that low-level API. In this how-to, we will rewrite the OSU benchmarks example of the main tutorial to use the low-level dependency API.
Here is the full code:
import os

import reframe as rfm
import reframe.utility.sanity as sn
import reframe.utility.typecheck as typ
import reframe.utility.udeps as udeps
from reframe.core.builtins import require_deps, sanity_function


@rfm.simple_test
class fetch_osu_benchmarks(rfm.RunOnlyRegressionTest):
    descr = 'Fetch OSU benchmarks'
    version = variable(str, value='7.3')
    executable = 'wget'
    executable_opts = [
        f'http://mvapich.cse.ohio-state.edu/download/mvapich/osu-micro-benchmarks-{version}.tar.gz'  # noqa: E501
    ]
    local = True
    valid_systems = ['pseudo-cluster:login']
    valid_prog_environs = ['gnu']

    @sanity_function
    def validate_download(self):
        return sn.assert_eq(self.job.exitcode, 0)


@rfm.simple_test
class build_osu_benchmarks(rfm.CompileOnlyRegressionTest):
    descr = 'Build OSU benchmarks'
    build_system = 'Autotools'
    build_prefix = variable(str)
    valid_systems = ['pseudo-cluster:compute']
    valid_prog_environs = ['gnu-mpi']

    @run_after('init')
    def add_dependencies(self):
        self.depends_on('fetch_osu_benchmarks', udeps.fully)

    @require_deps
    def prepare_build(self, fetch_osu_benchmarks):
        target = fetch_osu_benchmarks(part='login', environ='gnu')
        tarball = f'osu-micro-benchmarks-{target.version}.tar.gz'
        self.build_prefix = tarball[:-7]  # remove .tar.gz extension

        fullpath = os.path.join(target.stagedir, tarball)
        self.prebuild_cmds = [
            f'cp {fullpath} {self.stagedir}',
            f'tar xzf {tarball}',
            f'cd {self.build_prefix}'
        ]
        self.build_system.max_concurrency = 8


class osu_base_test(rfm.RunOnlyRegressionTest):
    '''Base class of OSU benchmarks runtime tests'''

    valid_systems = ['pseudo-cluster:compute']
    valid_prog_environs = ['gnu-mpi']
    num_tasks = 2
    num_tasks_per_node = 1
    kind = variable(str)
    benchmark = variable(str)
    metric = variable(typ.Str[r'latency|bandwidth'])

    @run_after('init')
    def add_dependencies(self):
        self.depends_on('build_osu_benchmarks', udeps.by_env)

    @require_deps
    def prepare_run(self, build_osu_benchmarks):
        osu_binaries = build_osu_benchmarks()
        self.executable = os.path.join(
            osu_binaries.stagedir, osu_binaries.build_prefix,
            'c', 'mpi', self.kind, self.benchmark
        )
        self.executable_opts = ['-x', '100', '-i', '1000']

    @sanity_function
    def validate_test(self):
        return sn.assert_found(r'^8', self.stdout)

    def _extract_metric(self, size):
        return sn.extractsingle(rf'^{size}\s+(\S+)', self.stdout, 1, float)

    @run_before('performance')
    def set_perf_vars(self):
        make_perf = sn.make_performance_function
        if self.metric == 'latency':
            self.perf_variables = {
                'latency': make_perf(self._extract_metric(8), 'us')
            }
        else:
            self.perf_variables = {
                'bandwidth': make_perf(self._extract_metric(1048576), 'MB/s')
            }


@rfm.simple_test
class osu_latency_test(osu_base_test):
    descr = 'OSU latency test'
    kind = 'pt2pt/standard'
    benchmark = 'osu_latency'
    metric = 'latency'
    executable_opts = ['-x', '3', '-i', '10']


@rfm.simple_test
class osu_bandwidth_test(osu_base_test):
    descr = 'OSU bandwidth test'
    kind = 'pt2pt/standard'
    benchmark = 'osu_bw'
    metric = 'bandwidth'
    executable_opts = ['-x', '3', '-i', '10']


@rfm.simple_test
class osu_allreduce_test(osu_base_test):
    descr = 'OSU Allreduce test'
    kind = 'collective/blocking'
    benchmark = 'osu_allreduce'
    metric = 'bandwidth'
    executable_opts = ['-m', '8', '-x', '3', '-i', '10']
Contrary to when using fixtures, dependencies are now explicitly defined using the depends_on() method.
The target test is referenced by name and the option how argument defines how the individual cases of the two tests depend on each other.
Remember that a test generates a test case for each combination of valid systems and valid environments.
There are some shortcuts for defining common dependency patterns, such as the udeps.fully and udeps.by_env.
The former defines that all the test cases of the current test depend on all the test cases of the target, whereas the latter defines that test cases depend by environment, i.e., a test case of the current test depends on a test case of the target test only when the environment is the same.
In our example, the build_osu_benchmarks depends fully on the fetch_osu_benchmarks whereas the final benchmarks depend on the build_os_benchmarks by environment.
This is similar to the session and environment scopes of fixtures, but you have to set the valid_systems and valid_prog_environs of the targets, whereas for fixtures these will be automatically determined by the scope.
This makes the low-level dependencies less flexible.
As with fixtures, you can still access fully the target test, but the way to do so is a bit more involved. There are two ways to access the target dependencies:
Using the
@require_depsdecorator.Using the low-level
getdep()method.
The @require_deps acts as a special post-setup hook (in fact, it is always the first post-setup hook of the test) that binds each argument of the decorated function to the corresponding target dependency.
For the binding to work correctly, the function arguments must be named after the target dependencies.
However, referring to a dependency only by the test’s name is not enough, since a test might be associated with multiple environments or partitions.
For this reason, each dependency argument is essentially bound to a function that accepts as argument the name of the target partition and target programming environment.
If no arguments are passed, the current programming environment is implied, such that build_osu_benchmarks() is equivalent to build_osu_benchmarks(self.current_environ.name, self.current_partition.name).
If the target partition and environment do not match the current ones, we should specify them, as is the case for accessing the fetch_osu_benchmarks dependency.
This call returns a handle to the actual target test object that, exactly as it happens when accessing the fixture handle in a post-setup hook.
Target dependencies can also be accessed directly using the getdep() function.
This is what both the @require_deps decorator and fixtures use behind the scenes.
Let’s rewrite the dependency hooks using the low-level getdep() function:
@run_before('compile')
def prepare_build(self):
    target = self.getdep('fetch_osu_benchmarks', 'gnu', 'login')
    ...

@run_before('run')
def prepare_run(self):
    osu_binaries = self.getdep('build_osu_benchmarks')
    ...
For running and listing tests with dependencies the same principles apply as with fixtures as ReFrame only sees dependencies and test cases. The only difference in listing is that there is no scope associated with the dependent tests as is with fixtures:
reframe --prefix=/scratch/rfm-stage/ -C config/cluster_mpi.py -c mpi/osu_deps.py -n osu_allreduce_test -l
[List of matched checks]
- osu_allreduce_test /63dd518c
    ^build_osu_benchmarks /f6911c4c
      ^fetch_osu_benchmarks /52d9b2c6
Found 3 check(s)
Resolving dependencies
When defining a low-level dependency using the depends_on() function, the target test cases must exist, otherwise ReFrame will refuse to load the dependency chain and will issue a warning.
Similarly, when requesting access to a target test case using getdep(), if the target test case does not exist, the current test will fail.
To fully understand how the different cases of a test depend on the cases of another test and how to express more complex dependency relations, please refer to How Test Dependencies Work In ReFrame. It is generally preferable to use the higher-level fixture API instead of the low-level dependencies as it’s more intuitive, less error-prone and offers more flexibility.
Depending on parameterized tests
As we have seen earlier, tests define their dependencies by referencing the target tests by their unique name.
This is straightforward when referring to regular tests, where their name matches the class name, but it becomes cumbersome trying to refer to a parameterized tests, since no safe assumption should be made as of the variant number of the test or how the parameters are encoded in the name.
In order to safely and reliably refer to a parameterized test, you should use the get_variant_nums() and variant_name() class methods as shown in the following example:
import reframe as rfm
import reframe.utility.sanity as sn
from reframe.core.builtins import parameter, sanity_function


@rfm.simple_test
class TestA(rfm.RunOnlyRegressionTest):
    z = parameter(range(10))
    executable = 'echo'
    valid_systems = ['*']
    valid_prog_environs = ['*']

    @run_after('init')
    def set_exec_opts(self):
        self.executable_opts = [str(self.z)]

    @sanity_function
    def validate(self):
        return sn.assert_eq(
            sn.extractsingle(r'\d+', self.stdout, 0, int), self.z
        )


@rfm.simple_test
class TestB(rfm.RunOnlyRegressionTest):
    executable = 'echo'
    valid_systems = ['*']
    valid_prog_environs = ['*']
    sanity_patterns = sn.assert_true(1)

    @run_after('init')
    def setdeps(self):
        variants = TestA.get_variant_nums(z=lambda x: x > 5)
        for v in variants:
            self.depends_on(TestA.variant_name(v))
In this example, TestB depends only on selected variants of TestA.
The get_variant_nums() method accepts a set of key-value pairs representing the target test parameters and selector functions and returns the list of the variant numbers that correspond to these variants.
Using the variant_name() subsequently, we can get the actual name of the variant.
reframe -c deps/parameterized.py -l
[List of matched checks]
- TestB /cc291487
    ^TestA %z=9 /ca1c96ee
    ^TestA %z=8 /75b6718c
    ^TestA %z=7 /1d87616c
    ^TestA %z=6 /06c8e673
- TestA %z=5 /536115e0
- TestA %z=4 /b1aa0bc1
- TestA %z=3 /e62d23e8
- TestA %z=2 /423a76e9
- TestA %z=1 /8258ae7a
- TestA %z=0 /7a14ae93
Found 11 check(s)
Integrating into a CI pipeline
Added in version 3.4.1.
Instead of running your tests, you can ask ReFrame to generate a child pipeline specification for the Gitlab CI. This will spawn a CI job for each ReFrame test respecting test dependencies. You could run your tests in a single job of your Gitlab pipeline, but you would not take advantage of the parallelism across different CI jobs. Having a separate CI job per test makes it also easier to spot the failing tests.
As soon as you have set up a runner for your repository, it is fairly straightforward to use ReFrame to automatically generate the necessary CI steps.
The following is an example of .gitlab-ci.yml file that does exactly that:
stages:
  - generate
  - test

generate-pipeline:
  stage: generate
  script:
    - reframe --ci-generate=${CI_PROJECT_DIR}/pipeline.yml -c ${CI_PROJECT_DIR}/path/to/tests
  artifacts:
    paths:
      - ${CI_PROJECT_DIR}/pipeline.yml

test-jobs:
  stage: test
  trigger:
    include:
      - artifact: pipeline.yml
        job: generate-pipeline
    strategy: depend
It defines two stages.
The first one, called generate, will call ReFrame to generate the pipeline specification for the desired tests.
All the usual test selection options can be used to select specific tests.
ReFrame will process them as usual, but instead of running the selected tests, it will generate the correct steps for running each test individually as a Gitlab job in a child pipeline.
The generated ReFrame command that will run each individual test reuses the -C, -R, -v and --mode options passed to the initial invocation of ReFrame that was used to generate the pipeline.
Users can define CI-specific execution modes in their configuration in order to pass arbitrary options to the ReFrame invocation in the child pipeline.
Finally, we pass the generated CI pipeline file to the second phase as an artifact and we are done!
If image keyword is defined in .gitlab-ci.yml, the emitted pipeline will use the same image as the one defined in the parent pipeline.
Besides, each job in the generated pipeline will output a separate junit report which can be used to create GitLab badges.
The following figure shows one part of an automatically generated pipeline.
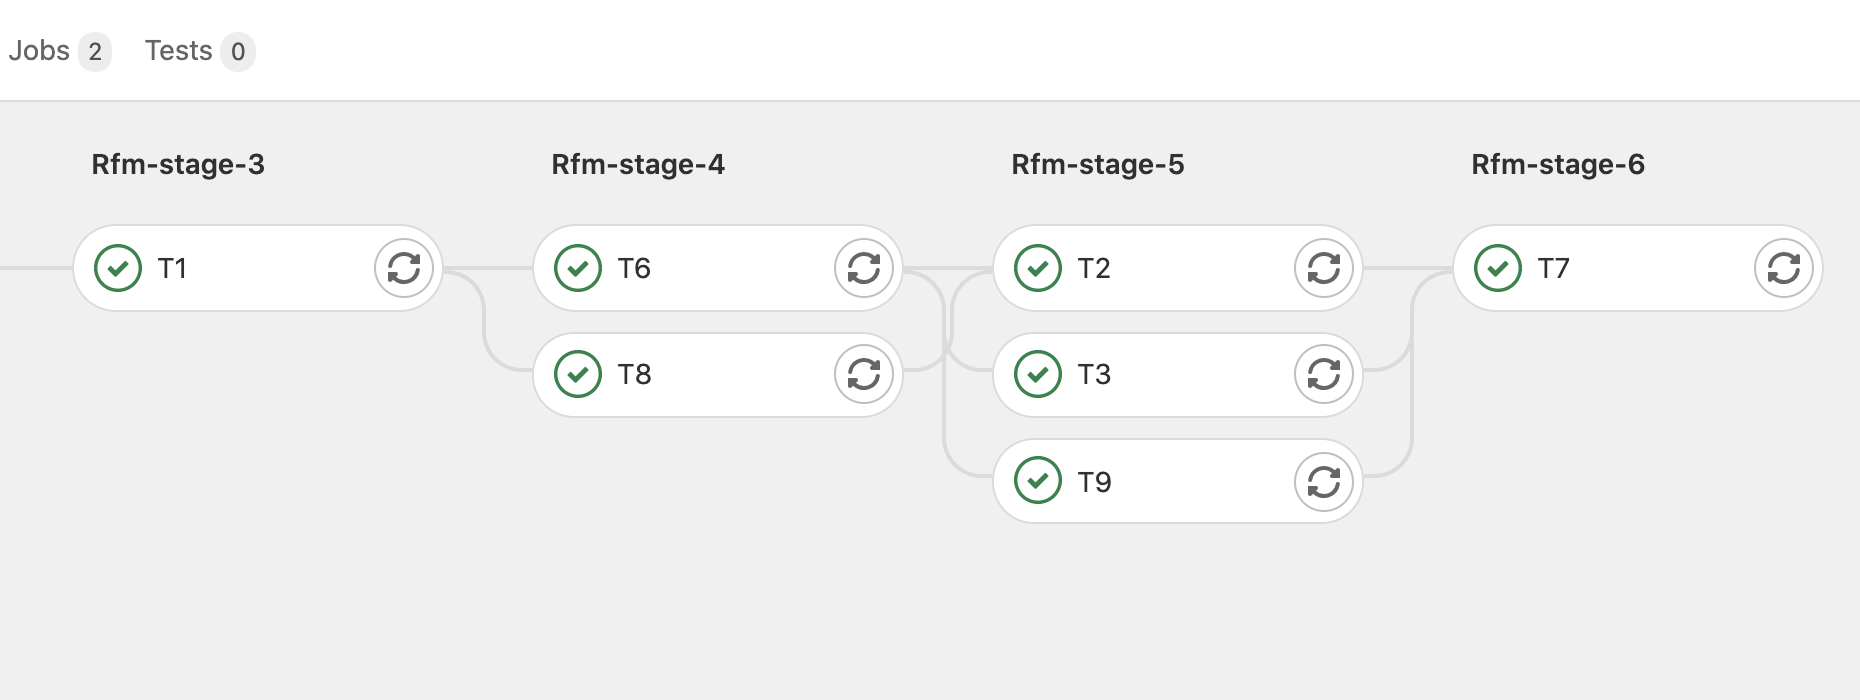
Snapshot of a Gitlab pipeline generated automatically by ReFrame.
Note
The ReFrame executable must be available in the Gitlab runner that will run the CI jobs.
Flexible tests
Added in version 2.15.
ReFrame can automatically set the number of tasks of a particular test, if its num_tasks attribute is set to a negative value or zero.
In ReFrame’s terminology, such tests are called flexible.
Negative values indicate the minimum number of tasks that are acceptable for this test (a value of -4 indicates that at least 4 tasks are required).
A zero value indicates the default minimum number of tasks which is equal to num_tasks_per_node.
By default, ReFrame will spawn such a test on all the idle nodes of the current system partition, but this behavior can be adjusted with --flex-alloc-nodes command-line option.
Flexible tests are very useful for multi-node diagnostic tests.
In this example, we demonstrate this feature by forcing flexible execution in the OSU allreduce benchmark.
reframe --prefix=/scratch/rfm-stage/ -C config/cluster_mpi.py -c mpi/osu.py -n osu_allreduce_test -S num_tasks=0 -r
By default, our version of the OSU allreduce benchmark uses two processes, but setting num_tasks to zero will span the test to the full pseudo-cluster occupying all three available nodes:
admin@login:~$ squeue
             JOBID PARTITION     NAME     USER ST       TIME  NODES NODELIST(REASON)
                 5       all rfm_osu_    admin  R       1:04      3 nid[00-02]
Note that for flexible tests, num_tasks is updated to the actual value of tasks that ReFrame requested just after the test job is submitted.
Thus, the actual number of tasks can then be used in sanity or performance checking.
Tip
If you want to run multiple flexible tests at once that compete for the same nodes, you will have to run them using the serial execution policy, because the first test will take all the available idel nodes causing the rest to fail immediately, as there will be no available nodes for them.
Testing containerized applications
Added in version 2.20.
ReFrame can be used also to test applications that run inside a container. First, you will need to enable the container platform support in ReFrame’s configuration:
site_configuration = {
    'systems': [
        {
            'name': 'tutorialsys',
            'descr': 'Example system',
            'hostnames': ['.*'],
            'partitions': [
                {
                    'name': 'default',
                    'descr': 'Example partition',
                    'scheduler': 'local',
                    'launcher': 'local',
                    'environs': ['builtin'],
                    'container_platforms': [{'type': 'Docker'}]
                }
            ]
        }
    ]
}
For each partition, users can define a list of all supported container platforms using the container_platforms configuration parameter.
In this case define the Docker platform.
If your system supports multiple configuration platforms, ReFrame offers more configuration options, such as setting up the environment or indicating which platform is the default one.
To denote that a test should be launched inside a container, the test must set the container_platform variable.
Here is an example:
import reframe as rfm
import reframe.utility.sanity as sn


@rfm.simple_test
class ContainerTest(rfm.RunOnlyRegressionTest):
    container_platform = 'Docker'
    valid_systems = ['*']
    valid_prog_environs = ['*']

    @run_before('run')
    def setup_container_platf(self):
        self.container_platform.image = f'ubuntu:18.04'
        self.container_platform.command = (
            "bash -c 'cat /etc/os-release | tee /rfm_workdir/release.txt'"
        )

    @sanity_function
    def assert_release(self):
        os_release_pattern = r'18.04.\d+ LTS \(Bionic Beaver\)'
        return sn.assert_found(os_release_pattern, 'release.txt')
A container-based test should be written as a RunOnlyRegressionTest.
The container_platform variable accepts a string that corresponds to the name of the container platform that will be used to run the container for this test.
It is not necessary to set this variable, in which case, the default container platform of the current partition will be used.
You can still differentiate your test based on the actual container platform that is being used by checking the self.container_platform.name variable.
As soon as the container platform to be used is determined, you need to specify the container image to use by setting the image.
If the image is not specified, then the container logic is skipped and the test executes as if the container_platform was never set.
The image is the only mandatory attribute for container-based checks.
It is important to note that the executable and executable_opts attributes of the actual test are ignored if the containerized code path is taken, i.e., when image is not None.
Running the test, ReFrame will generate a script that will launch and run the container for the given platform:
Note
This example must be run natively.
reframe -C examples/tutorial/config/baseline_contplatf.py -c examples/tutorial/containers/container_test.py -r
And this is the generated test job script:
#!/bin/bash
docker pull ubuntu:18.04
docker run --rm -v "/Users/karakasv/Repositories/reframe/stage/tutorialsys/default/builtin/ContainerTest":"/rfm_workdir" -w /rfm_workdir ubuntu:18.04 bash -c 'cat /etc/os-release | tee /rfm_workdir/release.txt'
By default, ReFrame will pull the image, but this can be skipped by setting the container_platform ‘s pull_image attribute to False.
Also, ReFrame will mount the stage directory of the test under /rfm_workdir inside the container.
Once the commands are executed, the container is stopped and ReFrame goes on with the sanity and performance checks.
Besides the stage directory, additional mount points can be specified through the mount_points container_platform attribute:
self.container_platform.mount_points = [('/path/to/host/dir1', '/path/to/container/mount_point1'),
                                        ('/path/to/host/dir2', '/path/to/container/mount_point2')]
The container filesystem is ephemeral, therefore, ReFrame mounts the stage directory under /rfm_workdir inside the container where the user can copy artifacts as needed.
These artifacts will therefore be available inside the stage directory after the container execution finishes.
This is very useful if the artifacts are needed for the sanity or performance checks.
If the copy is not performed by the default container command, the user can override this command by settings the container_platform ‘s command such as to include the appropriate copy commands.
In the current test, the output of the cat /etc/os-release is available both in the standard output as well as in the release.txt file, since we have used the command:
bash -c 'cat /etc/os-release | tee /rfm_workdir/release.txt'
and /rfm_workdir corresponds to the stage directory on the host system.
Therefore, the release.txt file can now be used in the subsequent sanity checks:
    @sanity_function
    def assert_release(self):
        os_release_pattern = r'18.04.\d+ LTS \(Bionic Beaver\)'
        return sn.assert_found(os_release_pattern, 'release.txt')
Changed in version 3.12.0: There is no need any more to explicitly set the container_platform in the test.
This is automatically initialized from the default platform of the current partition.
Generating tests programmatically
You can use ReFrame to generate tests programmatically using the special make_test() function.
This function creates a new test type as if you have typed it manually using the class keyword.
You can create arbitrarily complex tests that use variables, parameters, fixtures and pipeline hooks.
In this tutorial, we will use make_test() to build a simple domain-specific syntax for generating variants of STREAM benchmarks.
Our baseline STREAM test is the one presented in the ReFrame Tutorial that uses a build fixture:
import os
import reframe as rfm
import reframe.utility.sanity as sn
from reframe.core.builtins import (
    fixture,
    sanity_function,
    performance_function,
)


class build_stream(rfm.CompileOnlyRegressionTest):
    build_system = 'SingleSource'
    sourcepath = 'stream.c'
    executable = './stream.x'

    @run_before('compile')
    def prepare_build(self):
        omp_flag = self.current_environ.extras.get('omp_flag')
        self.build_system.cflags = ['-O3', omp_flag]


@rfm.simple_test
class stream_test(rfm.RunOnlyRegressionTest):
    valid_systems = ['*']
    valid_prog_environs = ['+openmp']
    stream_binary = fixture(build_stream, scope='environment')

    @run_after('setup')
    def set_executable(self):
        self.executable = os.path.join(self.stream_binary.stagedir, 'stream.x')

    @sanity_function
    def validate(self):
        return sn.assert_found(r'Solution Validates', self.stdout)

    @performance_function('MB/s')
    def copy_bw(self):
        return sn.extractsingle(r'Copy:\s+(\S+)', self.stdout, 1, float)

    @performance_function('MB/s')
    def triad_bw(self):
        return sn.extractsingle(r'Triad:\s+(\S+)', self.stdout, 1, float)
For our example, we would like to create a simpler syntax for generating multiple different stream_test versions that could run all at once.
Here is an example specification file for those tests:
stream_workflows:
  - elem_type: 'float'
    array_size: 16777216
    num_iters: 10
    num_threads: 4
  - elem_type: 'double'
    array_size: 1048576
    num_iters: 100
    num_threads: 1
  - elem_type: 'double'
    array_size: 16777216
    num_iters: 10
    thread_scaling: [1, 2, 4, 8]
The thread_scaling configuration parameter for the last workflow will create a parameterised version of the test using different number of threads.
In total, we expect six stream_test versions to be generated by this configuration.
The process for generating the actual tests from this spec file comprises three steps and everything happens in a somewhat unconventional, though valid, ReFrame test file:
We load the test configuration from a spec file that is passed through the
STREAM_SPEC_FILEenvironment variable.Based on the loaded test specs, we generate the actual tests using the
make_test()function.We register the generated tests with the framework by applying manually the
@simple_testdecorator.
The whole code for generating the tests is the following and is only a few lines. Let’s walk through it.
import os
import yaml

import reframe as rfm
import reframe.core.builtins as builtins
from reframe.core.meta import make_test

from stream_variables import build_stream, stream_test


def load_specs():
    spec_file = os.getenv('STREAM_SPEC_FILE')
    if spec_file is None:
        raise ValueError('no spec file specified')

    with open(spec_file) as fp:
        try:
            specs = yaml.safe_load(fp)
        except yaml.YAMLError as err:
            raise ValueError(f'could not parse spec file: {err}') from err

    return specs


def generate_tests(specs):
    tests = []
    for i, spec in enumerate(specs['stream_workflows']):
        num_threads = spec.pop('num_threads', None)
        thread_scaling = spec.pop('thread_scaling', None)
        test_body = {
            'stream_binary': builtins.fixture(build_stream,
                                              scope='environment',
                                              variables=spec)
        }
        methods = []
        if thread_scaling:
            def _set_num_threads(test):
                test.num_threads = test.nthr

            test_body['nthr'] = builtins.parameter(thread_scaling)
            methods.append(
                builtins.run_after('init')(_set_num_threads)
            )
        elif num_threads:
            test_body['num_threads'] = num_threads

        tests.append(make_test(
            f'stream_test_{i}', (stream_test,),
            test_body,
            methods
        ))

    return tests


# Register the tests with the framework
for t in generate_tests(load_specs()):
    rfm.simple_test(t)
The load_specs() function simply loads the test specs from the YAML test spec file and does some simple sanity checking.
The generate_tests() function consumes the test specs and generates a test for each entry.
Each test inherits from the base stream_test and redefines its stream_binaries fixture so that it is instantiated with the set of variables specified in the test spec.
Remember that all the STREAM test variables in the YAML file refer to its build phase and thus its build fixture.
We also treat specially the thread_scaling spec parameter.
In this case, we add a num_threads parameter to the test and add a post-init hook that sets the test’s num_cpus_per_task.
Finally, we register the generated tests using the rfm.simple_test() decorator directly;
remember that make_test() returns a class.
The equivalent of our test generation for the third spec is exactly the following:
@rfm.simple_test
class stream_test_2(stream_test):
    stream_binary = fixture(build_stream, scope='environment',
                            variables={'elem_type': 'double',
                                       'array_size': 16777216,
                                       'num_iters': 10})
    nthr = parameter([1, 2, 4, 8])

    @run_after('init')
    def _set_num_threads(self):
        self.num_threads = self.nthr
And here is the listing of generated tests:
STREAM_SPEC_FILE=stream_config.yaml reframe -C config/baseline_environs.py -c stream/stream_workflows.py -l
[List of matched checks]
- stream_test_2 %nthr=8 %stream_binary.elem_type=double %stream_binary.array_size=16777216 %stream_binary.num_iters=10 /04f5cf62
    ^build_stream %elem_type=double %array_size=16777216 %num_iters=10 ~tutorialsys:default+gnu 'stream_binary /74d12df7
    ^build_stream %elem_type=double %array_size=16777216 %num_iters=10 ~tutorialsys:default+clang 'stream_binary /f3a963e3
- stream_test_2 %nthr=4 %stream_binary.elem_type=double %stream_binary.array_size=16777216 %stream_binary.num_iters=10 /1c09d755
    ^build_stream %elem_type=double %array_size=16777216 %num_iters=10 ~tutorialsys:default+gnu 'stream_binary /74d12df7
    ^build_stream %elem_type=double %array_size=16777216 %num_iters=10 ~tutorialsys:default+clang 'stream_binary /f3a963e3
- stream_test_2 %nthr=2 %stream_binary.elem_type=double %stream_binary.array_size=16777216 %stream_binary.num_iters=10 /acb6dc4d
    ^build_stream %elem_type=double %array_size=16777216 %num_iters=10 ~tutorialsys:default+gnu 'stream_binary /74d12df7
    ^build_stream %elem_type=double %array_size=16777216 %num_iters=10 ~tutorialsys:default+clang 'stream_binary /f3a963e3
- stream_test_2 %nthr=1 %stream_binary.elem_type=double %stream_binary.array_size=16777216 %stream_binary.num_iters=10 /e6eebc18
    ^build_stream %elem_type=double %array_size=16777216 %num_iters=10 ~tutorialsys:default+gnu 'stream_binary /74d12df7
    ^build_stream %elem_type=double %array_size=16777216 %num_iters=10 ~tutorialsys:default+clang 'stream_binary /f3a963e3
- stream_test_1 %stream_binary.elem_type=double %stream_binary.array_size=1048576 %stream_binary.num_iters=100 /514be749
    ^build_stream %elem_type=double %array_size=1048576 %num_iters=100 ~tutorialsys:default+gnu 'stream_binary /b841f3c9
    ^build_stream %elem_type=double %array_size=1048576 %num_iters=100 ~tutorialsys:default+clang 'stream_binary /ade049de
- stream_test_0 %stream_binary.elem_type=float %stream_binary.array_size=16777216 %stream_binary.num_iters=10 /c0c0f2bf
    ^build_stream %elem_type=float %array_size=16777216 %num_iters=10 ~tutorialsys:default+gnu 'stream_binary /6767ce8c
    ^build_stream %elem_type=float %array_size=16777216 %num_iters=10 ~tutorialsys:default+clang 'stream_binary /246007ff
Found 6 check(s)
Note
The path passed to STREAM_SPEC_FILE is relative to the test directory.
Since version 4.2, ReFrame changes to the test directory before loading a test file.
In prior versions you have to specify the path relative to the current working directory.
Using the Flux framework scheduler
This is a how to that will show how-to use ReFrame with Flux Framework. First, build the container here from the root of reframe.
$ docker build -f examples/tutorial/dockerfiles/flux.dockerfile -t flux-reframe .
Then shell inside, optionally binding the present working directory if you want to develop.
$ docker run -it -v $PWD:/code flux-reframe
$ docker run -it flux-reframe
Note that if you build the local repository, you’ll need to bootstrap and install again, as we have over-written the bin!
# In case of problems with pip, first clean the `external` directory with `rm -rf external`
./bootstrap.sh
And then reframe will again be in the local bin directory:
# which reframe
/code/bin/reframe
Then we can run ReFrame with the custom config config.py for flux.
# What tests are under examples/howto/flux?
$ cd examples/howto/flux
$ reframe -c . -C settings.py -l
[ReFrame Setup]
  version:           4.0.0-dev.1
  command:           '/code/bin/reframe -c examples/howto/flux -C examples/howto/flux/settings.py -l'
  launched by:       root@b1f6650222bc
  working directory: '/code'
  settings file:     'examples/howto/flux/settings.py'
  check search path: '/code/examples/howto/flux'
  stage directory:   '/code/stage'
  output directory:  '/code/output'

[List of matched checks]
- EchoRandTest /66b93401
Found 1 check(s)

Log file(s) saved in '/tmp/rfm-ilqg7fqg.log'
This also works
$ reframe -c examples/howto/flux -C examples/howto/flux/settings.py -l
And then to run tests, just replace -l (for list) with -r or
--run (for run):
$ reframe -c examples/howto/flux -C examples/howto/flux/settings.py --run
root@b1f6650222bc:/code# reframe -c examples/howto/flux -C examples/howto/flux/settings.py --run
[ReFrame Setup]
  version:           4.0.0-dev.1
  command:           '/code/bin/reframe -c examples/howto/flux -C examples/howto/flux/settings.py --run'
  launched by:       root@b1f6650222bc
  working directory: '/code'
  settings file:     'examples/howto/flux/settings.py'
  check search path: '/code/examples/howto/flux'
  stage directory:   '/code/stage'
  output directory:  '/code/output'

[==========] Running 1 check(s)
[==========] Started on Fri Sep 16 20:47:15 2022

[----------] start processing checks
[ RUN      ] EchoRandTest /66b93401 @generic:default+builtin
[       OK ] (1/1) EchoRandTest /66b93401 @generic:default+builtin
[----------] all spawned checks have finished

[  PASSED  ] Ran 1/1 test case(s) from 1 check(s) (0 failure(s), 0 skipped)
[==========] Finished on Fri Sep 16 20:47:15 2022
Run report saved in '/root/.reframe/reports/run-report.json'
Log file(s) saved in '/tmp/rfm-0avso9nb.log'
For advanced users or developers, here is how to run tests within the container:
Testing
./test_reframe.py --rfm-user-config=examples/howto/flux/settings.py unittests/test_schedulers.py -xs
Building test libraries and utilities
ReFrame tests are extremely modular. You can create libraries of base tests and utilities that others can use or extend. You can organize the source code of a test library as you would with a regular Python code. Let’s see a made-up example for demonstration purposes:
~/reframe-examples/howto
├── testlib
│   ├── __init__.py
│   ├── simple.py
│   └── utility
│       └── __init__.py
└── testlib_example.py
The testlib_example.py is fairly simple:
it extends the simple_echo_check from the test library and sets the message.
import reframe as rfm
from testlib.simple import simple_echo_check


@rfm.simple_test
class HelloFoo(simple_echo_check):
    message = 'Foo'
The simple_echo_check it echoes “Hello, <message>” and asserts the output.
It also uses a dummy fixture that it includes from a utility.
import reframe as rfm
import reframe.utility.sanity as sn
from .utility import dummy_fixture


@rfm.simple_test
class simple_echo_check(rfm.RunOnlyRegressionTest, pin_prefix=True):
    descr = 'Simple Echo Test'
    valid_systems = ['*']
    valid_prog_environs = ['builtin']
    executable = 'echo'
    executable_opts = ['Hello']
    message = variable(str, value='World')
    dummy = fixture(dummy_fixture, scope='environment')

    @run_before('run')
    def set_executable_opts(self):
        self.executable_opts += [self.message]

    @sanity_function
    def assert_sanity(self):
        return sn.assert_found(rf'Hello {self.message}', self.stdout)
Note that the simple_echo_check is also decorated as a @simple_test, meaning that it can be executed as a stand-alone check.
This is typical when you are building test libraries:
you want the base tests to be complete and functional making minimum assumptions for the target system/environment.
You can then specialize further the derived tests and add more constraints in their valid_systems or valid_prog_environs.
Let’s try running both the library and the derived tests:
reframe -c reframe-examples/howto/testlib_example.py -r
[----------] start processing checks
[ RUN      ] dummy_fixture ~generic:default+builtin /1fae4a8b @generic:default+builtin
[       OK ] (1/2) dummy_fixture ~generic:default+builtin /1fae4a8b @generic:default+builtin
[ RUN      ] HelloFoo /2ecd9f04 @generic:default+builtin
[       OK ] (2/2) HelloFoo /2ecd9f04 @generic:default+builtin
[----------] all spawned checks have finished
reframe -c reframe-examples/howto/testlib/simple.py -r
[----------] start processing checks
[ RUN      ] dummy_fixture ~generic:default+builtin /1fae4a8b @generic:default+builtin
[       OK ] (1/2) dummy_fixture ~generic:default+builtin /1fae4a8b @generic:default+builtin
[ RUN      ] simple_echo_check /8e1b0090 @generic:default+builtin
[       OK ] (2/2) simple_echo_check /8e1b0090 @generic:default+builtin
[----------] all spawned checks have finished
There is a little trick that makes running both the library test and the derived test so painlessly, despite the relative import of the utility module by the library test.
ReFrame loads the test files by importing them as Python modules using the file’s basename as the module name.
It also adds temporarily to the sys.path the parent directory of the test file.
This is enough to load the testlib.simple module in the testlib_example.py and since the simple module has a parent, Python knows how to resolve the relative import in from .utility import dummy_fixture (it will be resolved as testlib.utility).
However, loading directly the test library file, Python would not know the parent module of utility and would complain.
The trick is to create an empty testlib/__init__.py file, so as to tell ReFrame to load also testlib as a parent module.
Whenever ReFrame encounters an __init__.py file down the directory path leading to a test file, it will load it as a parent module, thus allowing relative imports to succeed.
Debugging
ReFrame tests are Python classes inside Python source files, so the usual debugging techniques for Python apply.
However, ReFrame will filter some errors and stack traces by default in order to keep the output clean.
Generally, full stack traces for user programming errors will not be printed and will not block the test loading process.
If a test has errors and cannot be loaded, an error message will be printed and the loading of the remaining tests will continue.
In the following, we have inserted a small typo in the stream_variables.py tutorial example:
reframe -C config/baseline_environs.py -c stream/stream_variables.py -l
WARNING: skipping test file '/home/user/reframe-examples/tutorial/stream/stream_variables.py': name error: stream/stream_variables.py:30: name 'varible' is not defined
    num_threads = varible(int, value=0)
 (rerun with '-v' for more information)
Rerunning with increased verbosity as the message suggests will give a full traceback.
Note
ReFrame cannot always track a user error back to its source, especially for some of the builtin functionality. In such cases, ReFrame will just print the error message but not the source code context.
Tip
The -v option can be specified multiple times to increase the verbosity level further.
Debugging sanity and performance patterns
When creating a new test that requires a complex output parsing for the sanity checking or for extracting the figures of merit, tuning the functions decorated by @sanity_function or @performance_function may involve some trial and error to debug the complex regular expressions required.
For lightweight tests which execute in few seconds, this trial and error may not be an issue at all.
However, when dealing with tests which take longer to run, this method can quickly become tedious and inefficient.
Tip
When dealing with make-based projects which take a long time to compile, you can use the command line option --dont-restage in order to speed up the compile stage in subsequent runs.
When a test fails, ReFrame will keep the test output in the stage directory after its execution, which means that one can load this output into a Python shell or another helper script without having to rerun the expensive test again.
If the test is not failing but the user still wants to experiment or modify the existing sanity or performance functions, the command line option --keep-stage-files can be used when running ReFrame to avoid deleting the stage directory.
With the executable’s output available in the stage directory, one can simply use the re module to debug regular expressions as shown below.
>>> import re

>>> # Read the test's output
>>> with open(the_output_file, 'r') as f:
...     test_output = ''.join(f.readlines())
...
>>> # Evaluate the regular expression
>>> re.findall(the_regex_pattern, test_output, re.MULTILINE)
Alternatively to using the re module, one could use all the sanity utility provided by ReFrame directly from the Python shell.
In order to do so, if ReFrame was installed manually using the bootstrap.sh script, one will have to make all the Python modules from the external directory accessible to the Python shell as shown below.
>>> import sys
>>> import os

>>> # Make ReFrame's dependencies available
>>> sys.path = ['/path/to/reframe/prefix/external'] + sys.path

>>> # Import ReFrame-provided sanity functions
>>> import reframe.utility.sanity as sn

>>> # Evaluate the regular expression
>>> assert sn.evaluate(sn.assert_found(the_regex_pattern, the_output_file))
Debugging test loading
If you are new to ReFrame, you might wonder sometimes why your tests are not loading or why your tests are not running on the partition they were supposed to run.
This can be due to ReFrame picking the wrong configuration entry or that your test is not written properly (not decorated, no valid_systems etc.).
If you try to load a test file and list its tests by increasing twice the verbosity level, you will get enough output to help you debug such issues.
Let’s try loading the stream_variables.py file:
reframe -C config/baseline_environs.py -c stream/stream_variables.py -l -vv
Loading user configuration
Loading the builtin configuration
Loading configuration file: 'config/baseline_environs.py'
Autodetecting system
Trying autodetection method: 'py::socket.gethostname'
Retrieved hostname: 'myhost'
Looking for a matching configuration entry
Configuration found: picking system 'tutorialsys'
Initializing runtime
Initializing system partition 'default'
Initializing system 'tutorialsys'
Initializing modules system 'nomod'
detecting topology info for tutorialsys:default
> found topology file '/home/user/.reframe/topology/tutorialsys-default/processor.json'; loading...
> device auto-detection is not supported
[ReFrame Environment]
  RFM_AUTODETECT_FQDN=<not set>
  RFM_AUTODETECT_METHOD=<not set>
  RFM_AUTODETECT_METHODS=<not set>
  RFM_AUTODETECT_XTHOSTNAME=<not set>
  RFM_CHECK_SEARCH_PATH=<not set>
  RFM_CHECK_SEARCH_RECURSIVE=<not set>
  RFM_CLEAN_STAGEDIR=<not set>
  RFM_COLORIZE=<not set>
  RFM_COMPRESS_REPORT=<not set>
  RFM_CONFIG_FILES=<not set>
  RFM_CONFIG_PATH=<not set>
  RFM_DUMP_PIPELINE_PROGRESS=<not set>
  RFM_GIT_TIMEOUT=<not set>
  RFM_HTTPJSON_URL=<not set>
  RFM_IGNORE_REQNODENOTAVAIL=<not set>
  RFM_INSTALL_PREFIX=/usr/local/share/reframe
  RFM_KEEP_STAGE_FILES=<not set>
  RFM_MODULE_MAPPINGS=<not set>
  RFM_MODULE_MAP_FILE=<not set>
  RFM_NON_DEFAULT_CRAYPE=<not set>
  RFM_OUTPUT_DIR=<not set>
  RFM_PERFLOG_DIR=<not set>
  RFM_PERF_INFO_LEVEL=<not set>
  RFM_PIPELINE_TIMEOUT=<not set>
  RFM_PREFIX=<not set>
  RFM_PURGE_ENVIRONMENT=<not set>
  RFM_REMOTE_DETECT=<not set>
  RFM_REMOTE_WORKDIR=<not set>
  RFM_REPORT_FILE=<not set>
  RFM_REPORT_JUNIT=<not set>
  RFM_RESOLVE_MODULE_CONFLICTS=<not set>
  RFM_SAVE_LOG_FILES=<not set>
  RFM_STAGE_DIR=<not set>
  RFM_SYSLOG_ADDRESS=<not set>
  RFM_SYSTEM=<not set>
  RFM_TIMESTAMP_DIRS=<not set>
  RFM_TRAP_JOB_ERRORS=<not set>
  RFM_UNLOAD_MODULES=<not set>
  RFM_USER_MODULES=<not set>
  RFM_USE_LOGIN_SHELL=<not set>
  RFM_VERBOSE=<not set>
[ReFrame Setup]
  version:           4.6.0-dev.2
  command:           '/usr/local/share/reframe/bin/reframe -C config/baseline_environs.py -c stream/stream_variables.py -l -vv'
  launched by:       user@myhost
  working directory: '/home/user/reframe-examples/tutorial'
  settings files:    '<builtin>', 'config/baseline_environs.py'
  check search path: '/home/user/reframe-examples/tutorial/stream/stream_variables.py'
  stage directory:   '/home/user/reframe-examples/tutorial/stage'
  output directory:  '/home/user/reframe-examples/tutorial/output'
  log files:         '/tmp/rfm-f2v37wl4.log'

Looking for tests in '/home/user/reframe-examples/tutorial/stream/stream_variables.py'
Validating '/home/user/reframe-examples/tutorial/stream/stream_variables.py': OK
  > Loaded 3 test(s)
Loaded 3 test(s)
Generated 4 test case(s)
Filtering test cases(s) by name: 2 remaining
Filtering test cases(s) by tags: 2 remaining
Filtering test cases(s) by other attributes: 2 remaining
Building and validating the full test DAG
Full test DAG:
  ('stream_test', 'tutorialsys:default', 'gnu') -> [('build_stream_32608d67', 'tutorialsys:default', 'gnu')]
  ('stream_test', 'tutorialsys:default', 'clang') -> [('build_stream_de1600df', 'tutorialsys:default', 'clang')]
  ('build_stream_de1600df', 'tutorialsys:default', 'clang') -> []
  ('build_stream_32608d67', 'tutorialsys:default', 'gnu') -> []
Pruned test DAG
  ('stream_test', 'tutorialsys:default', 'gnu') -> [('build_stream_32608d67', 'tutorialsys:default', 'gnu')]
  ('build_stream_32608d67', 'tutorialsys:default', 'gnu') -> []
  ('stream_test', 'tutorialsys:default', 'clang') -> [('build_stream_de1600df', 'tutorialsys:default', 'clang')]
  ('build_stream_de1600df', 'tutorialsys:default', 'clang') -> []
Final number of test cases: 4
[List of matched checks]
- stream_test /2e15a047
    ^build_stream ~tutorialsys:default+gnu 'stream_binary /40af02af
    ^build_stream ~tutorialsys:default+clang 'stream_binary /8effd276
Found 1 check(s)

Log file(s) saved in '/tmp/rfm-f2v37wl4.log'
>>> profiler report [start] <<<
main: 0.118834 s
    test processing: 0.037243 s
        RegressionCheckLoader.load_all: 0.028813 s
            TestRegistry.instantiate_all: 0.015122 s
        generate_testcases: 0.000090 s
        main.<locals>._sort_testcases: 0.000019 s
        build_deps: 0.000259 s
        validate_deps: 0.000097 s
        prune_deps: 0.000199 s
        toposort: 0.000200 s
        list_checks: 0.002932 s
>>> profiler report [ end ] <<<
You can see all the different phases ReFrame’s frontend goes through when loading a test.
After loading the configuration, ReFrame will print out its relevant environment variables and will start examining the given files in order to find and load ReFrame tests.
Before attempting to load a file, it will validate it and check if it looks like a ReFrame test.
If it does, it will load that file by importing it.
This is where any ReFrame tests are instantiated and initialized (see Loaded 3 test(s)), as well as the actual test cases (combination of tests, system partitions and environments) are generated.
Then the test cases are filtered based on the various filtering command line options as well as the programming environments that are defined for the currently selected system.
Finally, the test case dependency graph is built and everything is ready for running (or listing).
Try passing a specific system or partition with the --system option or modify the test (e.g., removing the decorator that registers it) and see how the logs change.
Extending the framework
Implementing a parallel launcher backend
It is not uncommon for sites to supply their own alternatives of parallel launchers that build on top of existing launchers and provide additional functionality or implement some specific site policies. In ReFrame it is straightforward to implement a custom parallel launcher backend without having to modify the framework code.
Let’s see how a builtin launcher looks like.
The following is the actual implementation of the mpirun launcher in ReFrame:
@register_launcher('mpirun')
class MpirunLauncher(JobLauncher):
    def command(self, job):
        return ['mpirun', '-np', str(job.num_tasks)]
Each launcher must derive from the abstract base class JobLauncher ands needs to implement the command() method and, optionally, change the default run_command() method.
The command() returns a list of command tokens that will be combined with any user-supplied job launcher options by the run_command() method to generate the actual launcher command line.
Notice you can use the job argument to get job-specific information that will allow you to construct the correct launcher invocation.
If you use a Python-based configuration file, you can define your custom launcher directly inside your config as follows:
from reframe.core.backends import register_launcher
from reframe.core.launchers import JobLauncher


@register_launcher('slrun')
class MySmartLauncher(JobLauncher):
    def command(self, job):
        return ['slrun', ...]

site_configuration = {
    'systems': [
        {
            'name': 'my_system',
            'partitions': [
                {
                    'name': 'my_partition',
                    'launcher': 'slrun'
                    ...
                }
            ],
            ...
        },
        ...
    ],
    ...
}
Note
In versions prior to 4.0, launchers could only be implemented inside the source code tree of ReFrame.
Implementing a custom log handler
Added in version 4.7.
ReFrame allows you to define custom log handlers and attach them to the framework. Here’s an example implementation of a custom log handler and how it can be used in a Python-based configuration file.
Define a custom log handler class based on Handler which uses a custom logging API:
import logging
import mylogger

class MyLoggerHandler(logging.Handler):
    def __init__(self, key):
        super().__init__()
        self.key = key

    def emit(self, record):
        myrecord = {
            'value': record.check_perf_value,
        }
        mylogger.log(self.key, myrecord)
Applying the @register_log_handler decorator to a function returns an instance of the custom log handler:
from reframe.core.logging import register_log_handler

@register_log_handler("mylogger")
def _create_mylogger_handler(site_config, config_prefix):
    key = site_config.get(f'{config_prefix}/key')
    return MyLoggerHandler(key)
Finally, add a handler entry with type matching the registered name for the custom log handler to the site config:
site_configuration = {
    'logging': [
        {
            'handlers': [
                {
                    'type': 'mylogger',
                    'key': 'abc',
                },
                ...
            ]
        }
    ],
    ...
}